Problem: I want to get this 20" SUN monitor to work on a standard PC for use in my MAME cabinet *.
Solution:
Originally we set out to build our own SYNC-convertor, however, before
we could start, we tested the monitor with a standard 13W3 to HD15 adaptor,
and guess what?..... it worked!
* - If you don't know what a MAME
Cabinet is: It's an "Arcade Style Machine" with a PC inside
that is running an emulator to emulate all those classic arcade games.
There is a GREAT examples here,
here and loads
here.
Go see for yourself !!!!
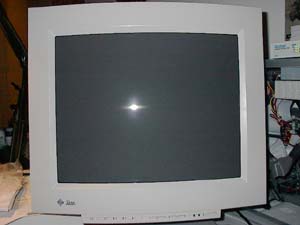
This is a SUN GDM-20e20
as you can see from the info-panel at the back of the monitor. The internals
of the monitor are manufactured by SONY. Click on this picture to get
a larger version of the info-panel.
In order to fully comprehend exactly why a SUN (or any other fixed freq.
monitor) will not work with a standard PC, you need to understand the
differences between the two. This is explained very well in the link below.
I recommend reading this
before proceeding further.


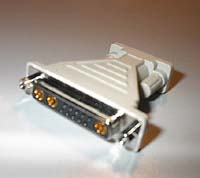
This is the hero of
the day, the actual adaptor itself. As you can see, it has FEMALE 13W3
on the one side, and HD15 (Male) on the other side.
I am sure by following the pinouts, you could just cut the cable, and
wire directly to the HD15 plug. For your sake, let's hope you know what
you're doing... ;)
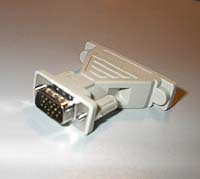
Irrefutable proof that the other side of this adaptor does indeed have a HD15 male interface on it ;-)
How the hell else do you plan on attaching it to your PC's video card?
I would strongly suggest (if running windoze) that you set your screen resolution to 800x600 @ 16 bit BEFORE you do this, or you may be staring at a blank screen.
Also, note that because the monitor does not support 640x400 (text mode), you will not see any of the windows "text" message as it loads up. (BIOS details, memory count etc). Just be patient. As soon as the PC switches to graphics mode (800x600), your picture will appear. You can then adjust as needed, then start tweaking to get the resolution higher.
Please note: There is apparently a driver for this monitor that will GREATLY improve performance, but I have been unable to find an active link to it. This was all tested using: "Default Monitor" driver in windoze. If/when I locate the driver, I will add a link to it here.

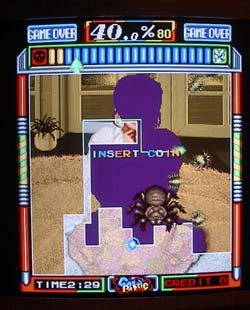
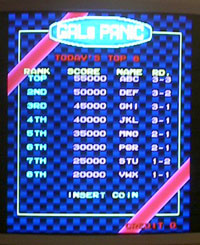
As you can see, here is MAME32 running Gals Panic. I forced the resolution to 1024x768 (from auto). No other changes made.
Although the digital photo's don't do justice to the image quality, I can assure you the image is crystal clear and the colours are very vibrant. No shaking, scrolling or any other hint of graphic malfunction or sync problems.
As with most things, there are pro's and cons to this entire undertaking,
so here they are:
PRO's:
- Great big monitor
;) Perfect for using inside my MAME cabinet.
- Cheap (A lot cheaper than a standard 20" PC monitor)
- Very simple to get to work.
CON's:
- Max resolution of
1280x1024 @ 16 bit colour. (Untested, since my current vid card will only
do that resolution and higher with 256 colours.) 1024x768 @16bit confirmed,
100% working.
- Max colour depth at any resolution is 16 bit.
- Refresh rate fixed for each supported resolution.
CONCLUSION:
- As a PC Monitor, this might not be such a good idea, as it's not an ideal setup and not very flexible at all, however, for a MAME cabinet, this is an EXCELLENT solution. The picture quality is SUPERB on all games, and will beat setting up a TV or arcade monitor any day. Ease of setup/use as well as COST are a major plus in favour of this configuration.
Questions,? Just click on the link below and ask...