 |
|
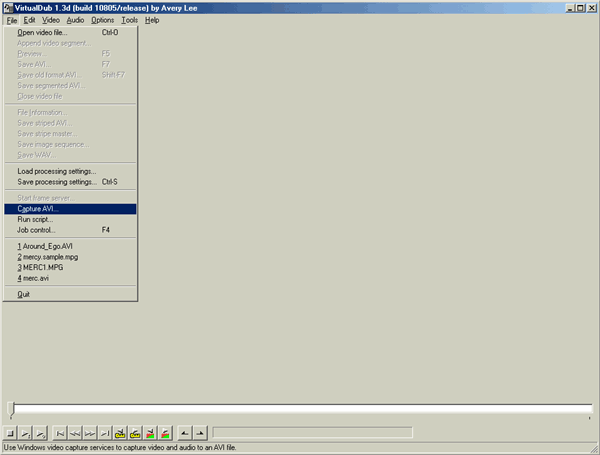
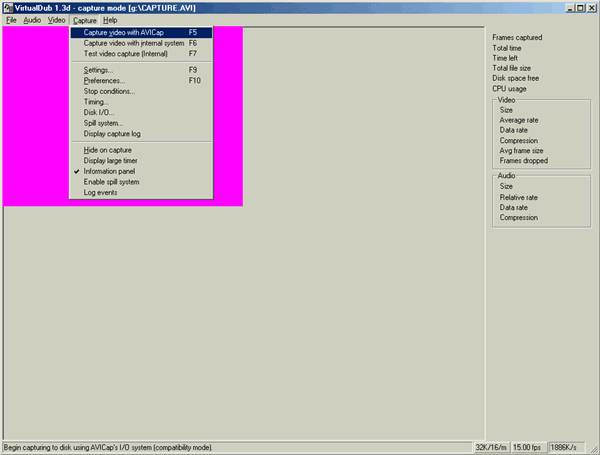
- Tell Virtualdub that you want to go to capture mode. |
|
A Beginners Guide to using VirtualDub (V1.3d) to Capture .AVI's! This tutorial is intended for complete beginners at capturing video, using VirtualDub. If you have a VHS (or other source) that you want converted to an .AVI file then this is for you. You can later use Virtualdub to DiVX your finished .AVI. |
| What you will need:
- VirtualDub - Free Video/Audio editing and conversion software. (V1.3d used in this example) Download it HERE. - An input source of your choice. Usually the Video Out feed from your Video Recorder. (As used in this example.) - Enough free hard drive space to store your completed .AVI. (Warning: Dumping AVI to hard drive consumes lots of space, and very quickly. Save to your fastest drive, with the most free space. |
Step 1: Download and install the software. Do not change ANYTHING! The only things you need to change are shown below:
|
|
- Tell Virtualdub that you want to go to capture mode. |
Step 2: Setup your audio compression (Or lack thereof ;)
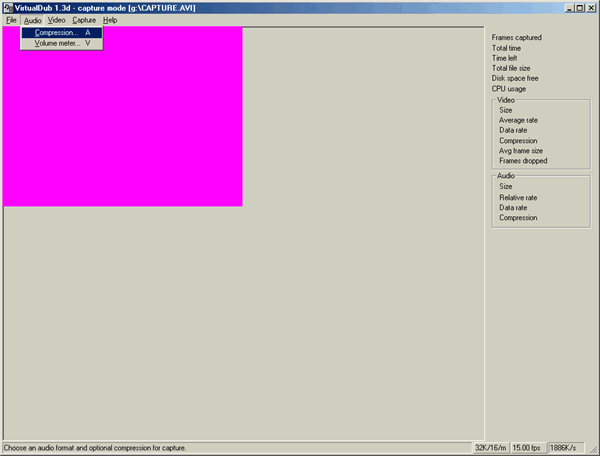 |
| - Click on "Audio / Compression..." This will take you to the smaller window (shown below). |
Step 3: Audio Compression
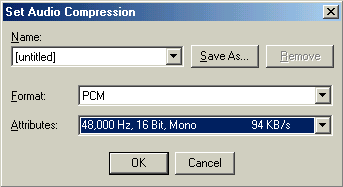 |
| - I usually choose the highest MONO rate I can find. Of course if you have a Stereo input, use at least 44.000Hz 16bit for Stereo. |
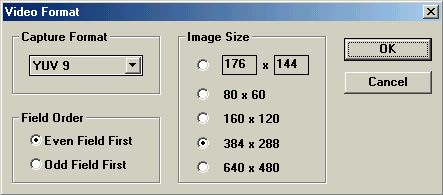
Step 4: Configuring the Video Format.
 |
| - Now we setup the video format. (see below). |
Step 5: Video Format
 |
|
- Here you'll need to experiment a little, but the settings above I have determined are perfect for my needs. - The bigger the Image Size, the more likely you are to drop frames. - I recommend you experiment until you're satisfied. |
Step 6: Configuring the Video Source.
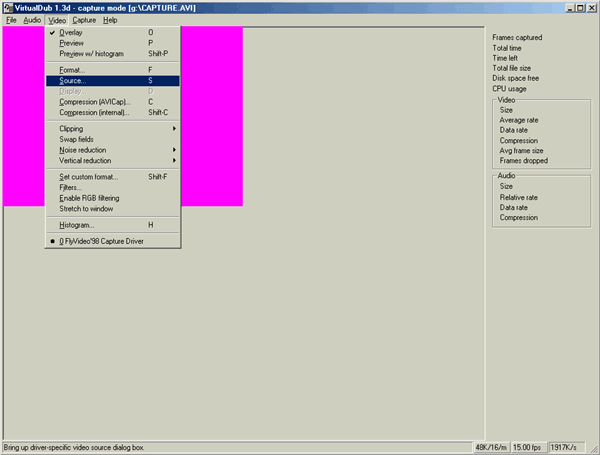 |
| - Time to setup the video source (see below) |
Step 7: Video Source
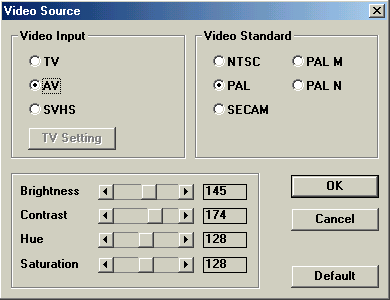 |
| - This may depend on your country's standard (ntsc/pal?) but for myself, I find these settings to be 100%. |
Step 8: Specify the Video Compression.
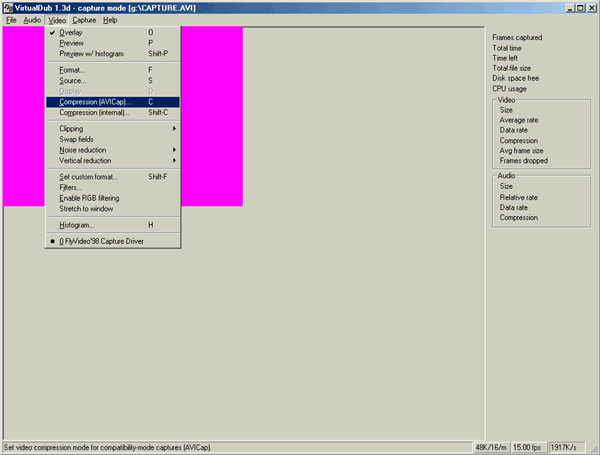 |
| - Time to setup the video compression (or, again, the lack thereof.) See below. |
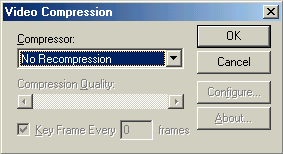
Step 9: Video Compression
 |
|
- Since we're doing raw .AVI, select NO comression. - Tempting to dump straight to DiVX? Yes it is, but I havn't gotten it to work... |
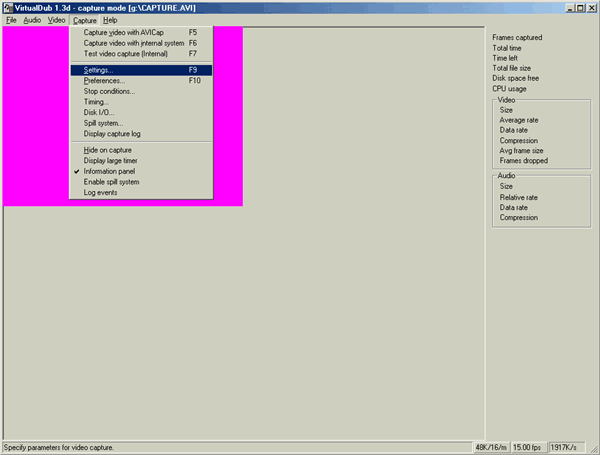
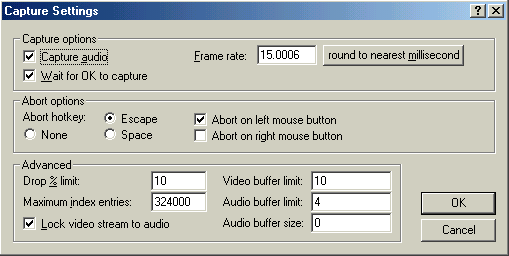
Step 10: Capture Settings
 |
|
- Setting up the settings for the capture. |
Step 11: Capture
 |
|
- Being on PAL, 15 frames per sec is fine. If your're using an NTSC source, use 20. - Setting it higher than required, will gain NOTHING, in fact you even LOOSE quality due to frames being dropped. |
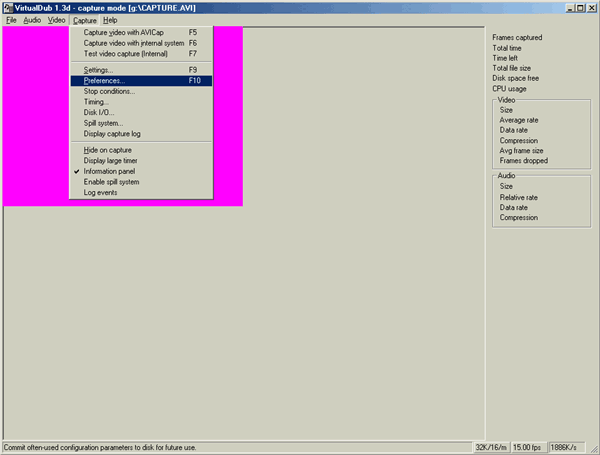
Step 12: Configuring your Preferences
 |
|
- The final preferences need to be set before the fun begins... |
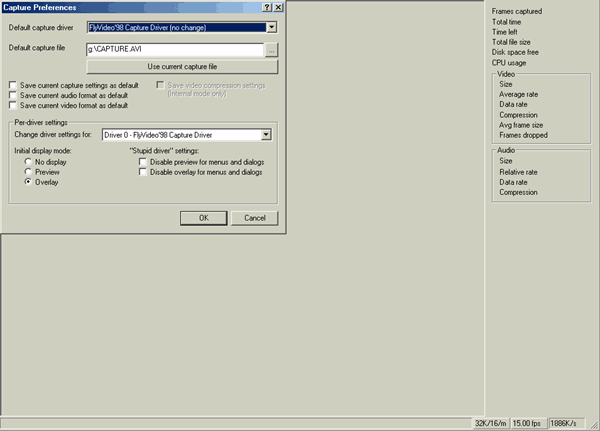
Step 13: Preferences
 |
|
- Make sure your TV/Video Card Driver is selected. - Make sure you tell it where to save the finished file! Specily the filename of your movie also.. |
Step 14: Get Ready...
 |
|
- Tell virtualdub to get ready to capture using AVIcap. -The internal video system is superior to videocap, but I had some problems with my capture card. You may want to try that if AVIcap works for you.. |
Step 15: Get Ready...
 |
|
- You are now ready to capture. Press play on your VCR (or other source), and click on "ok" to start capturing. - I set my threshold to 2% dropped frames, so that if 2% or more frames are dropped, the capture will abort. (Click "Capture"/"Stop Conditions") - When you have captured all you want, just press ESC. It won't say anyting like "File Captured" or "File saved", just go to the location you setup in step 13 and your file should be there! |
Final Gates: A lot of things have a bearing on the success of this capturing, so be sure to check everything, even the obvious,
- Do NOT multitask while capturing... frames WILL drop!
- Don't fuck with anything you don't need to. If you don't know what it is, leave it alone!
- I am fortunate enough to have Ultra-Wide SCSI Drives, so I can capture with ease... I have trouble capturing to my (5400rpm) IDE Drive.
ENJOY! Any questions, email me.
CopyLeft (C) 2000 SPUTNIK All righrts reserved.